3rd grade Science Project ~ Aries ~ MSP430 LaunchPad (MSP-EXP430G2)

Rehearsing the presentation 🙂


This is how we did it:

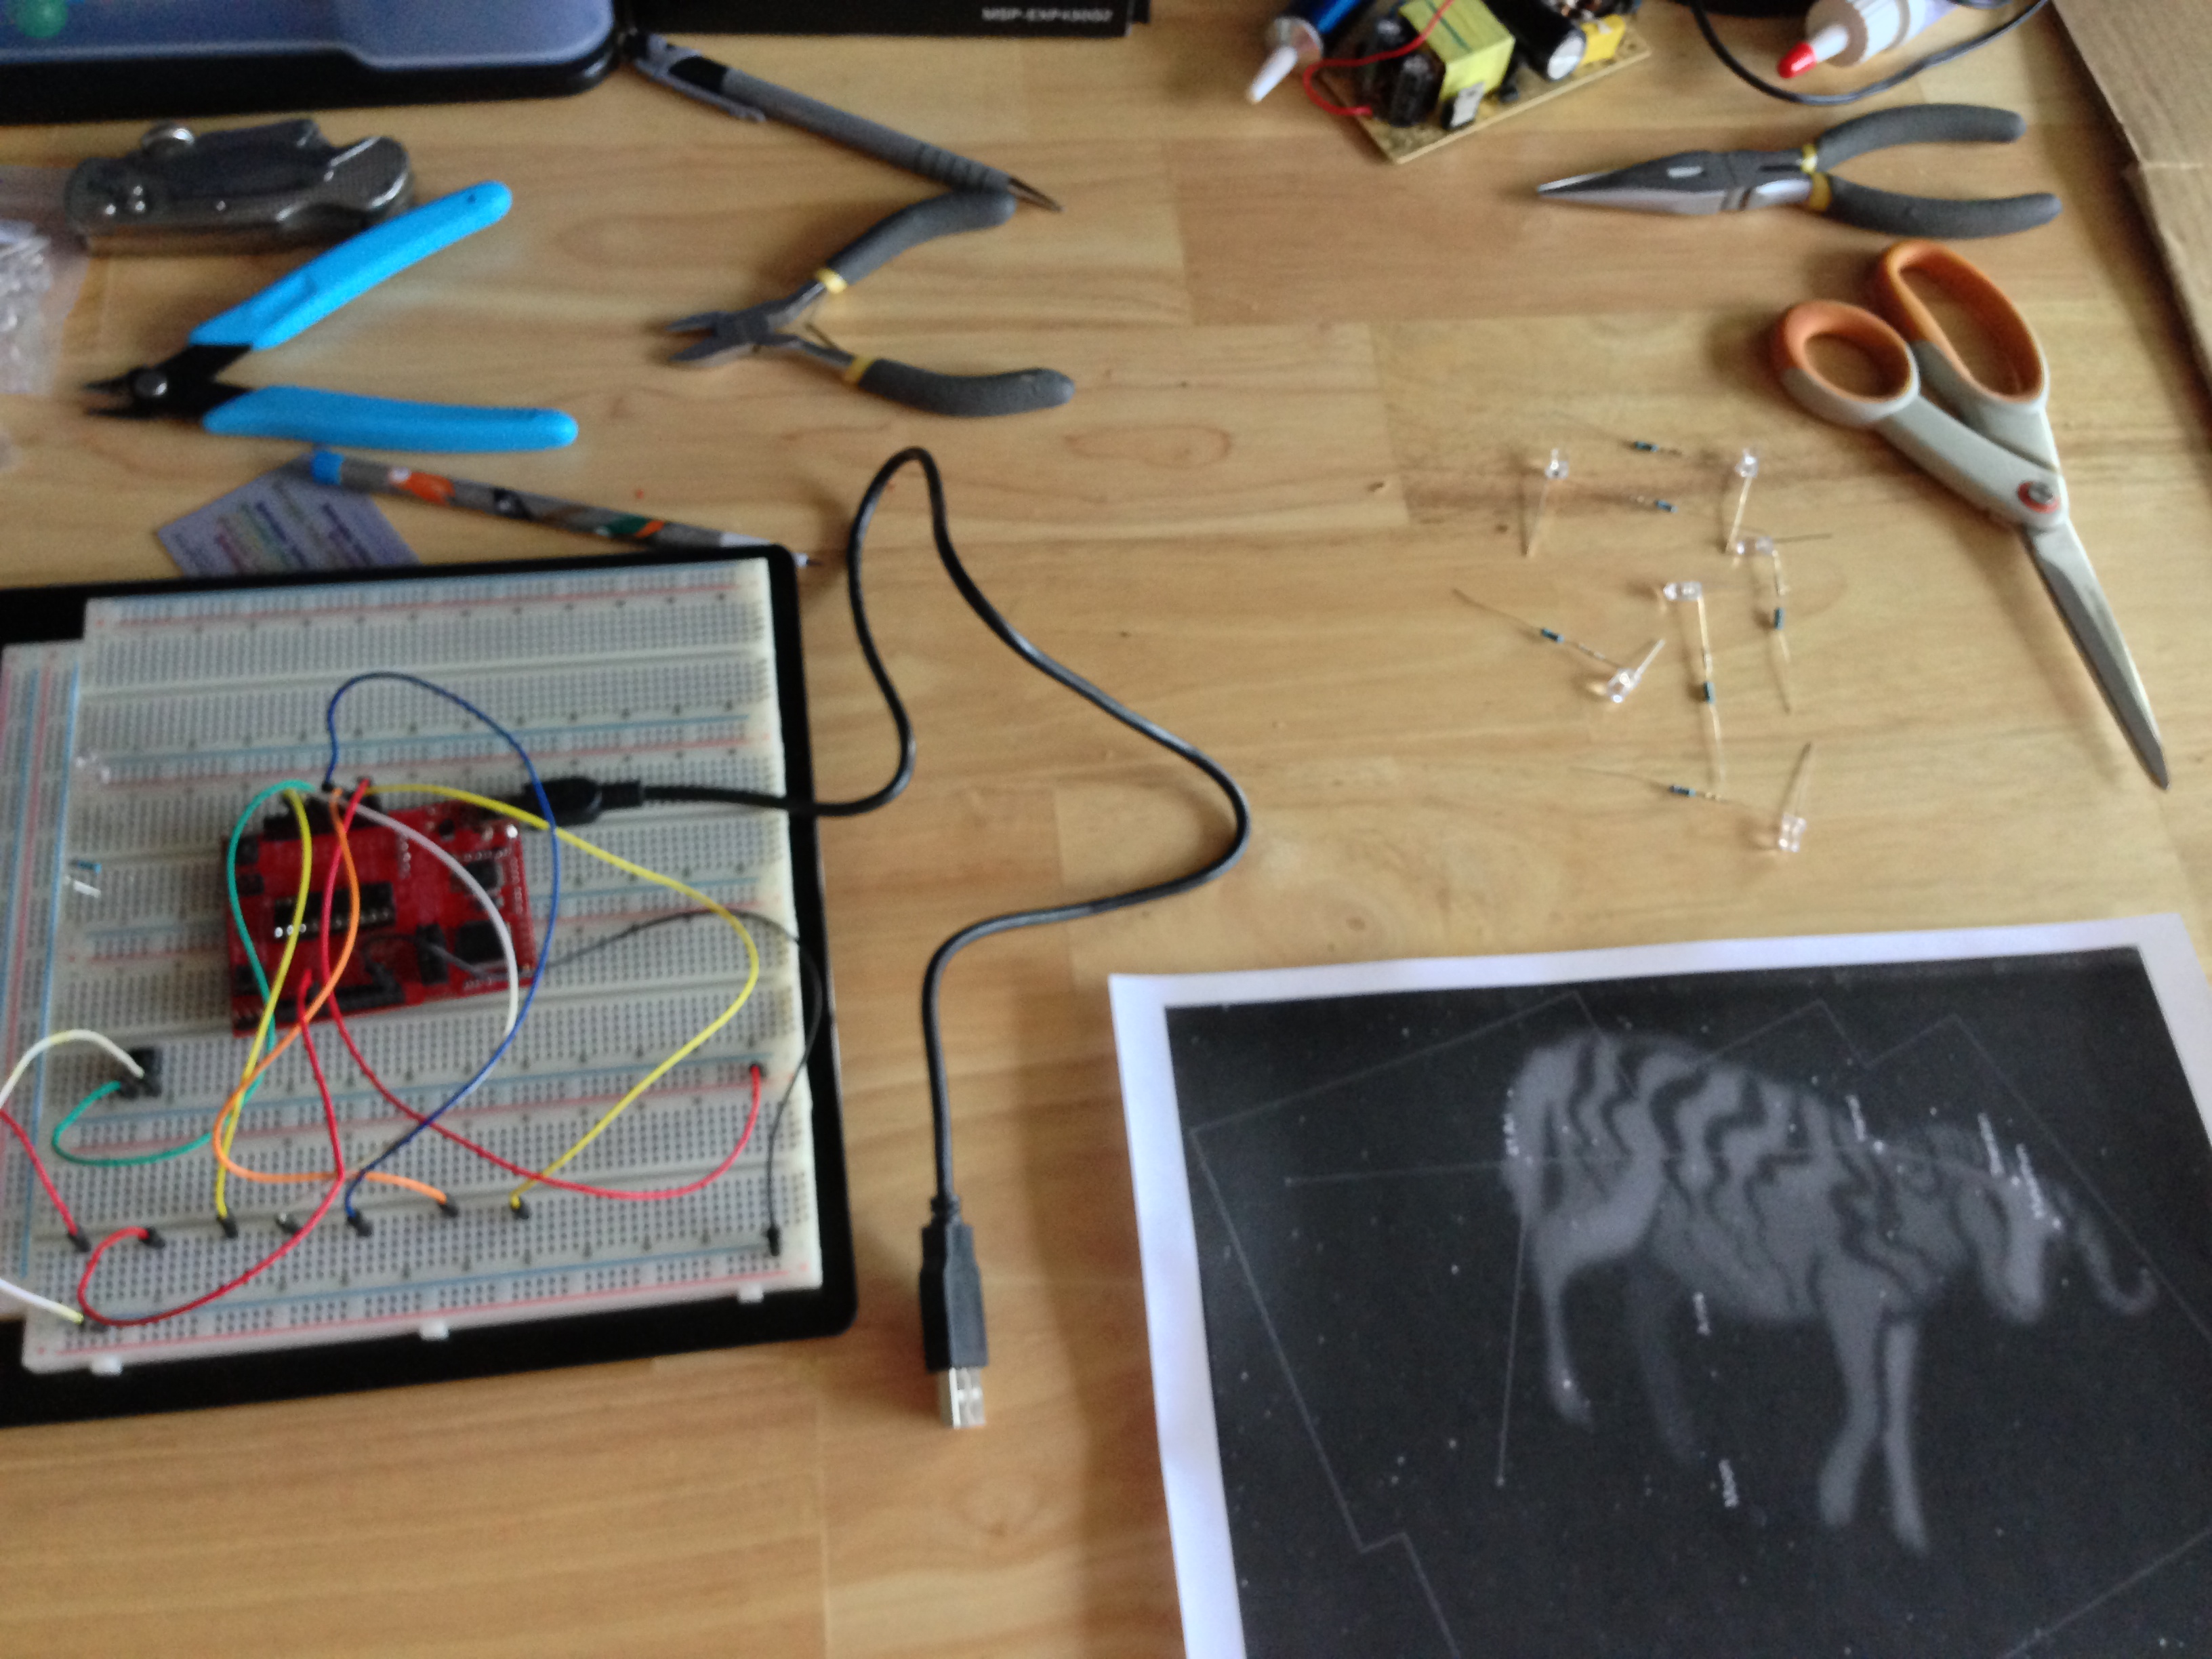
First we tested the concept, just turning on and off several colored LEDs.

Photo 2013-04-13 02.57.14 PM Photo 2013-04-13 02.57.10 PM Photo 2013-04-13 02.57.17 PM Photo 2013-04-13 02.57.21 PM


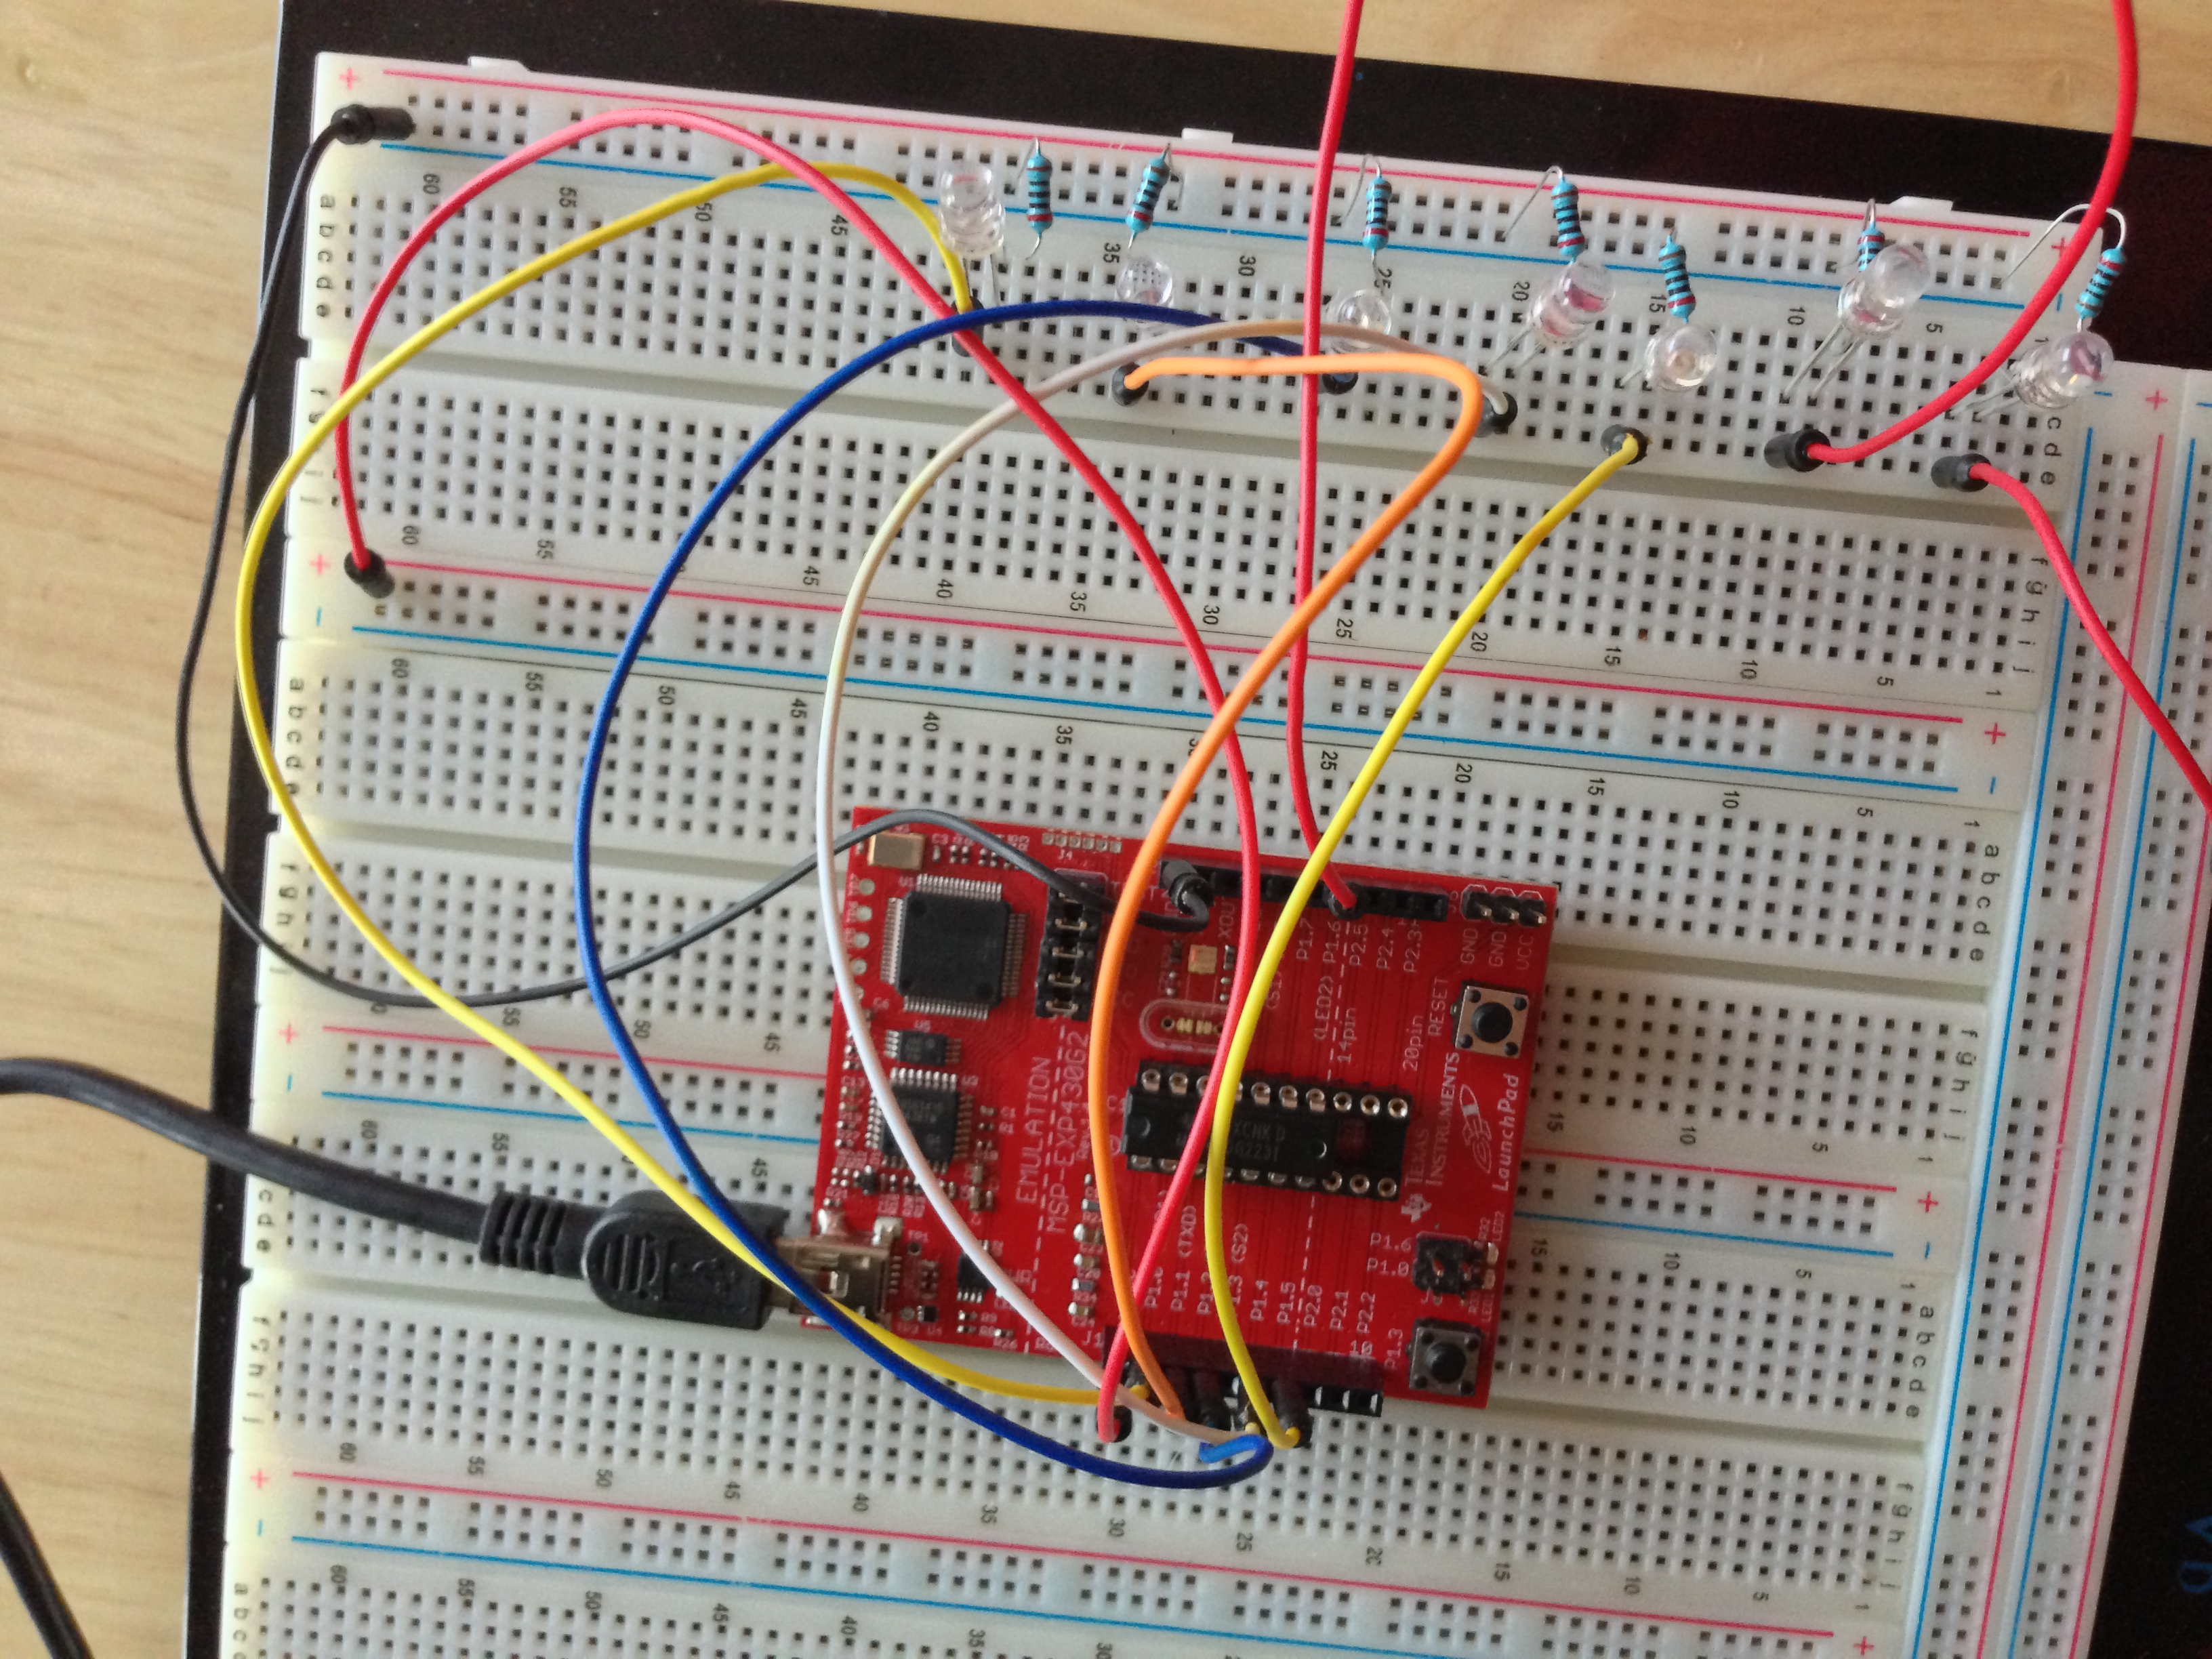
Second, we connected the LEDs to the output of the MSP430 and played with the code to make some LEDs light up.

Photo 2013-04-13 02.57.05 PM Photo 2013-04-13 02.56.57 PM

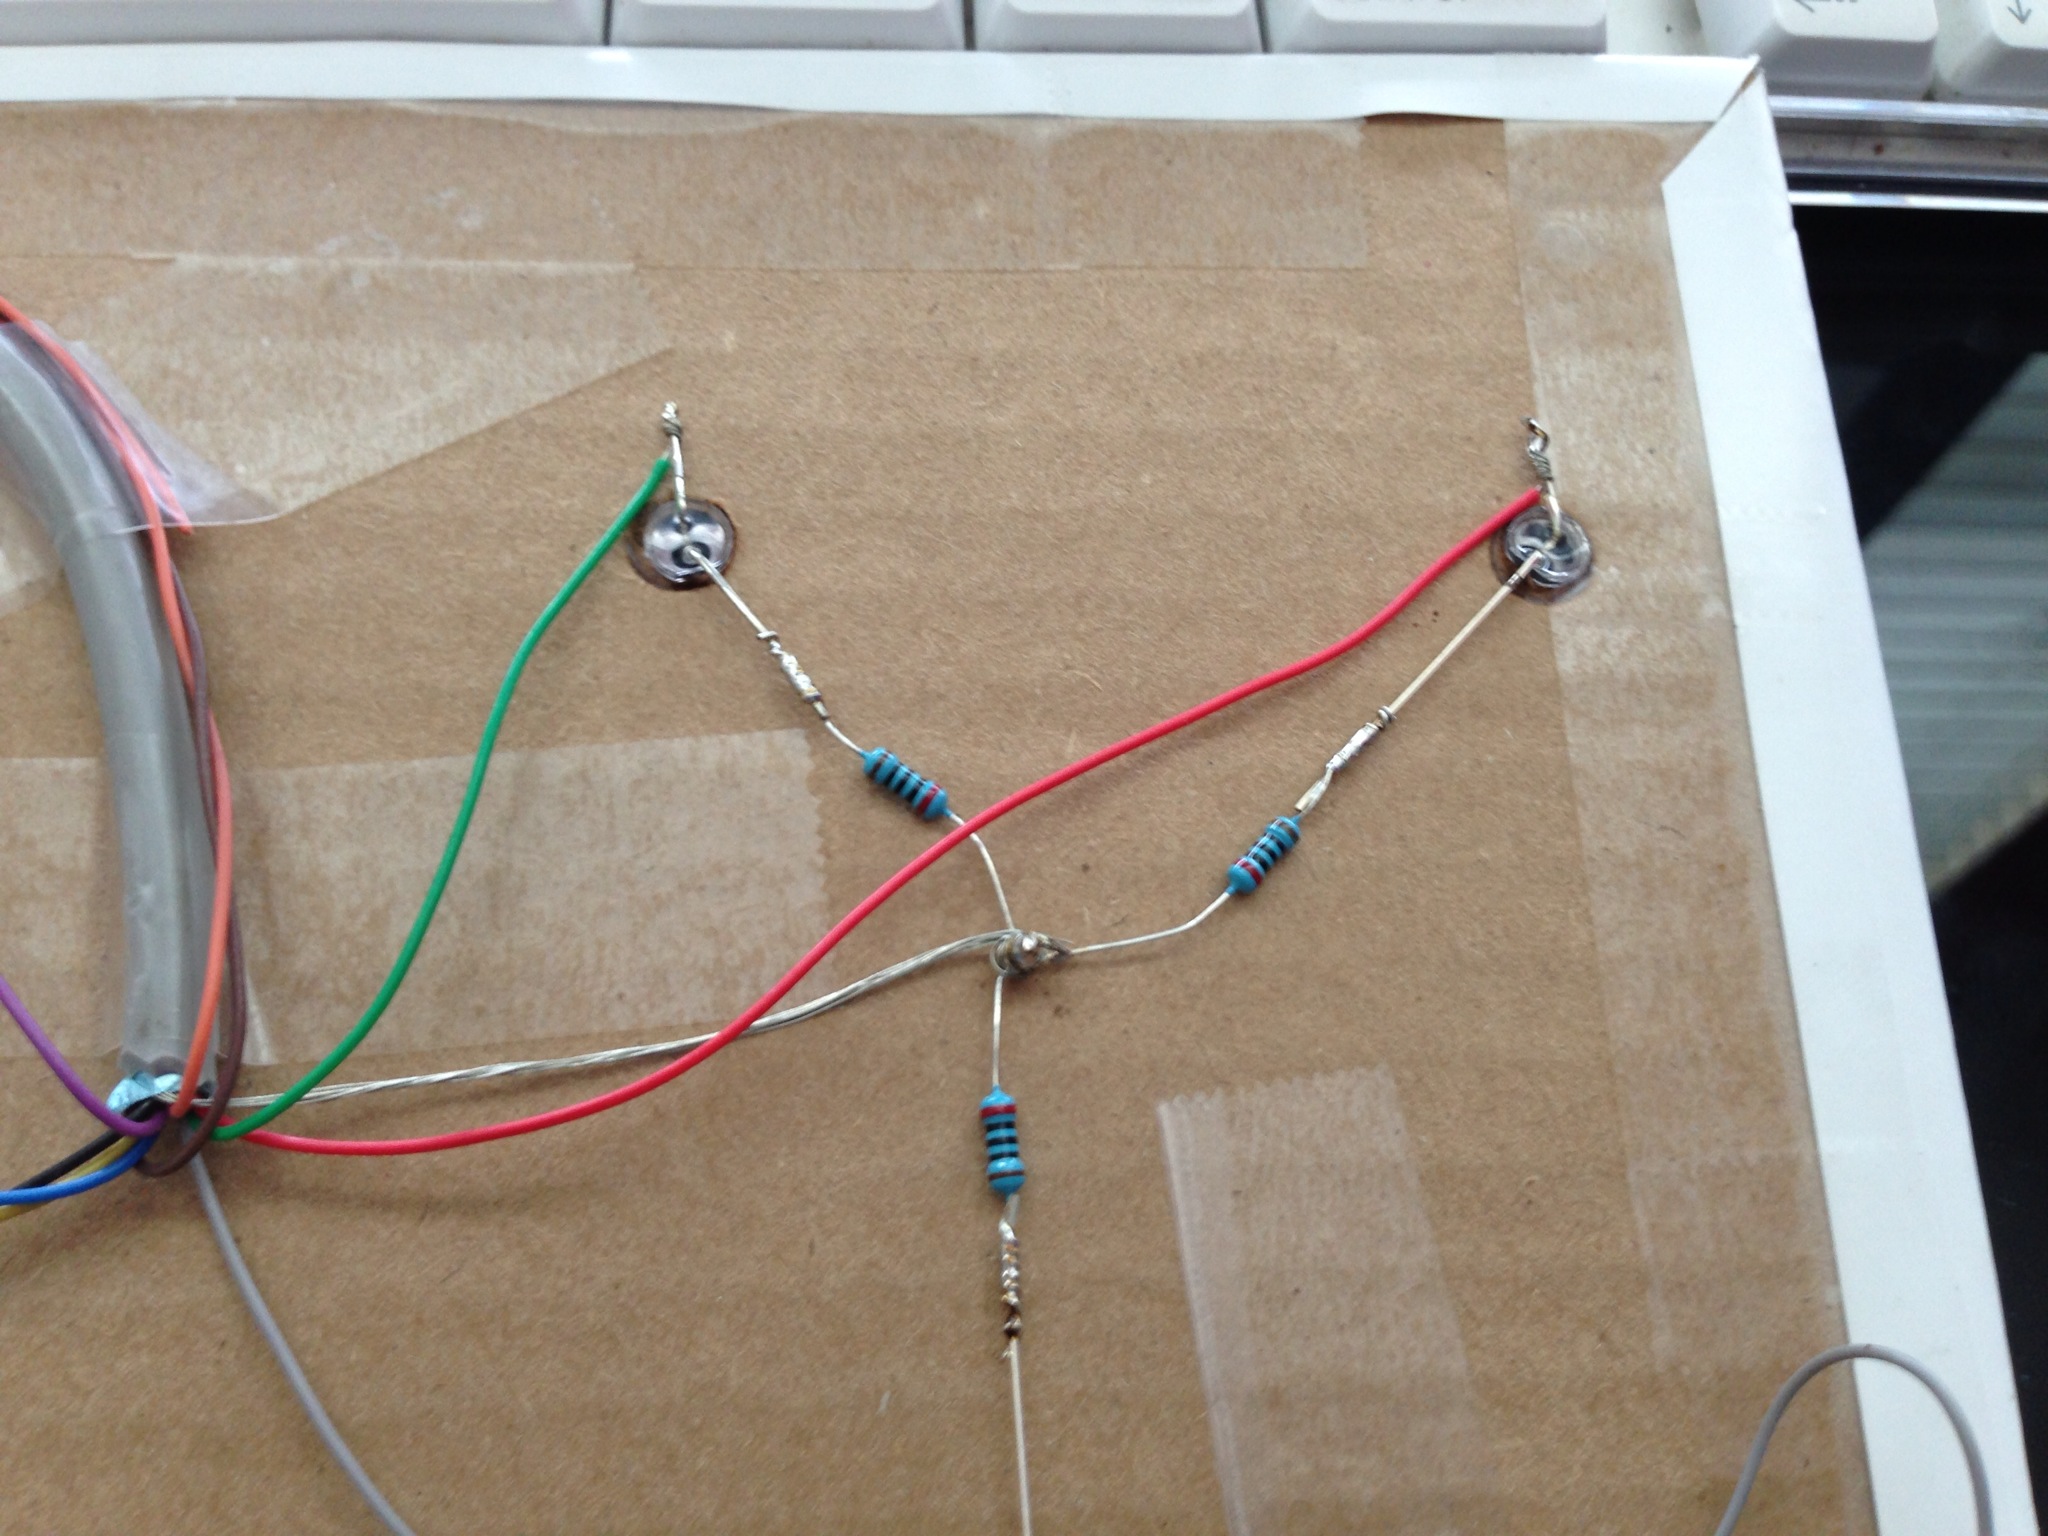
After we defined and fine tuned the code, we start soldering the LEDs to each resistor

Photo 2013-04-13 02.56.54 PM Photo 2013-04-13 02.56.50 PM Photo 2013-04-13 02.56.45 PM Photo 2013-04-13 02.56.41 PM Photo 2013-04-13 02.56.37 PM

Getting the following LED-Resistor pair.

Photo 2013-04-13 02.56.23 PM


Me print a picture of the constellation and glued to a cardboard, make holes for each star and plug and glue the LEDs on the board.

Photo 2013-04-13 02.38.13 PM Photo 2013-04-13 02.56.30 PM Photo 2013-04-13 02.38.10 PM Photo 2013-04-13 02.56.08 PM Photo 2013-04-13 02.56.12 PM

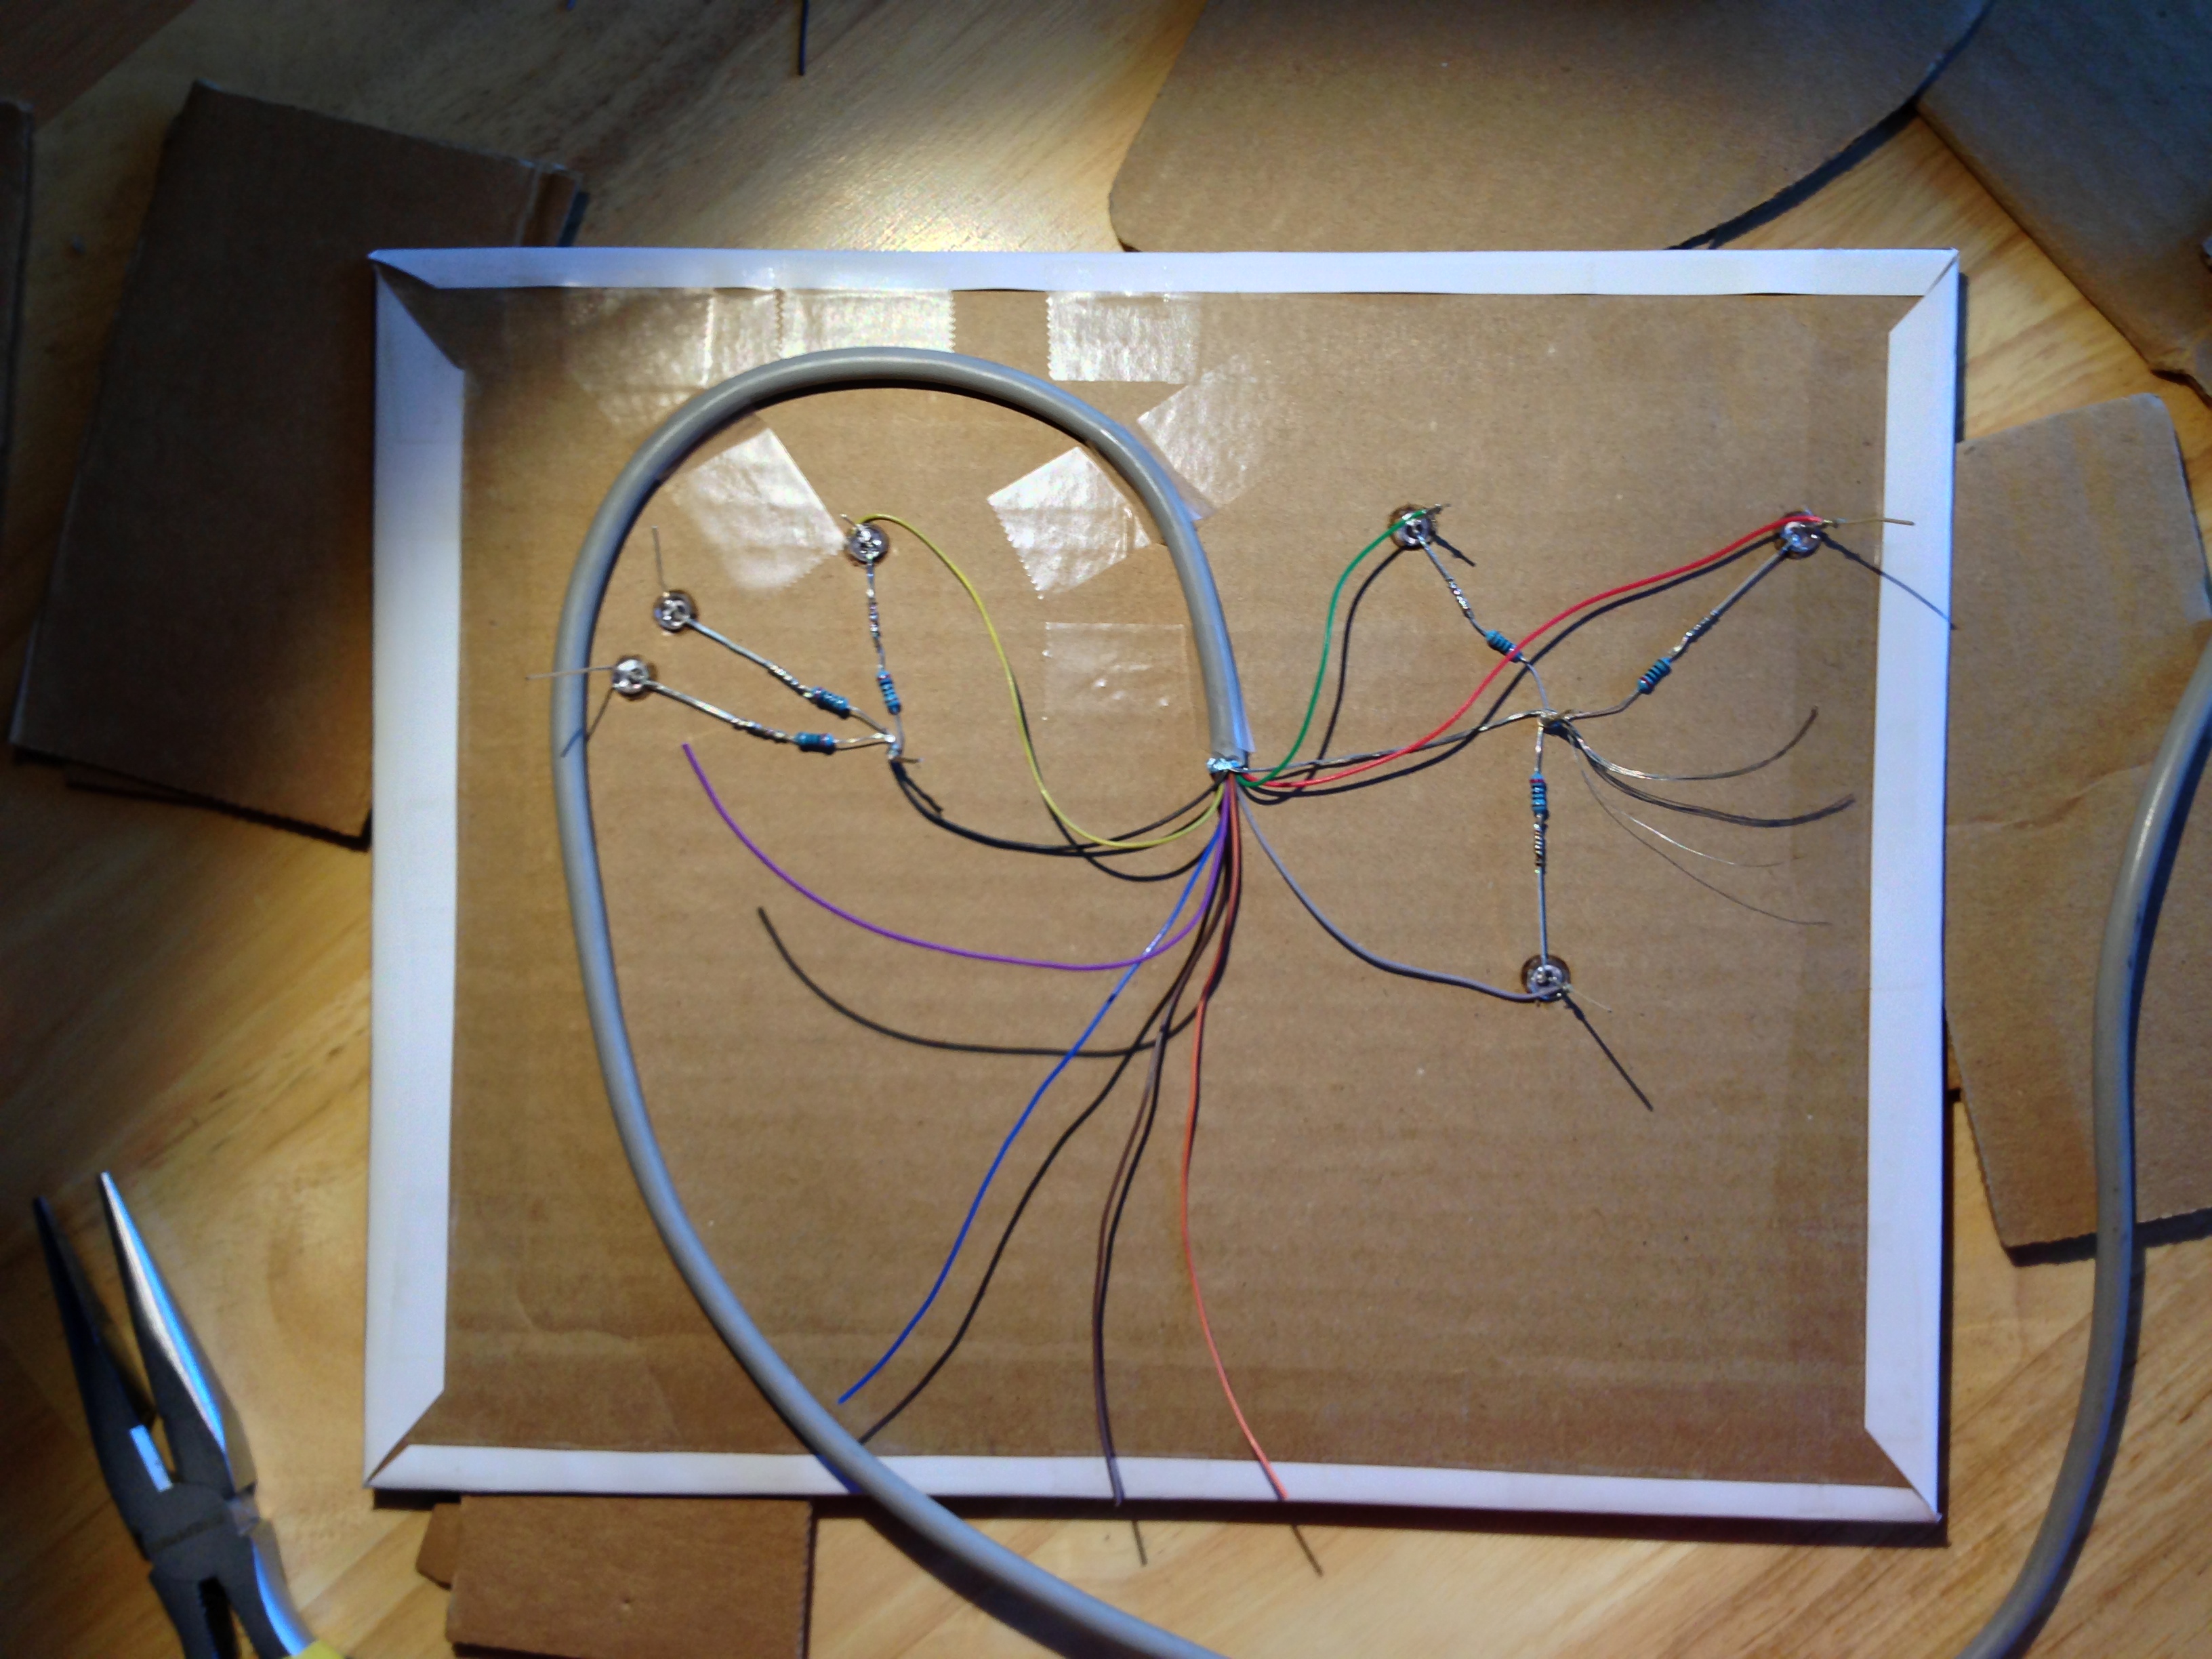
We made some more soldering on the cable to plug it on the MSP430 board, along with a battery holder (2 AA battery for a total of 3V).

Photo 2013-04-13 02.38.17 PM Photo 2013-04-13 02.55.49 PM Photo 2013-04-13 02.55.42 PM Photo 2013-04-13 02.55.56 PM Photo 2013-04-13 02.38.19 PM

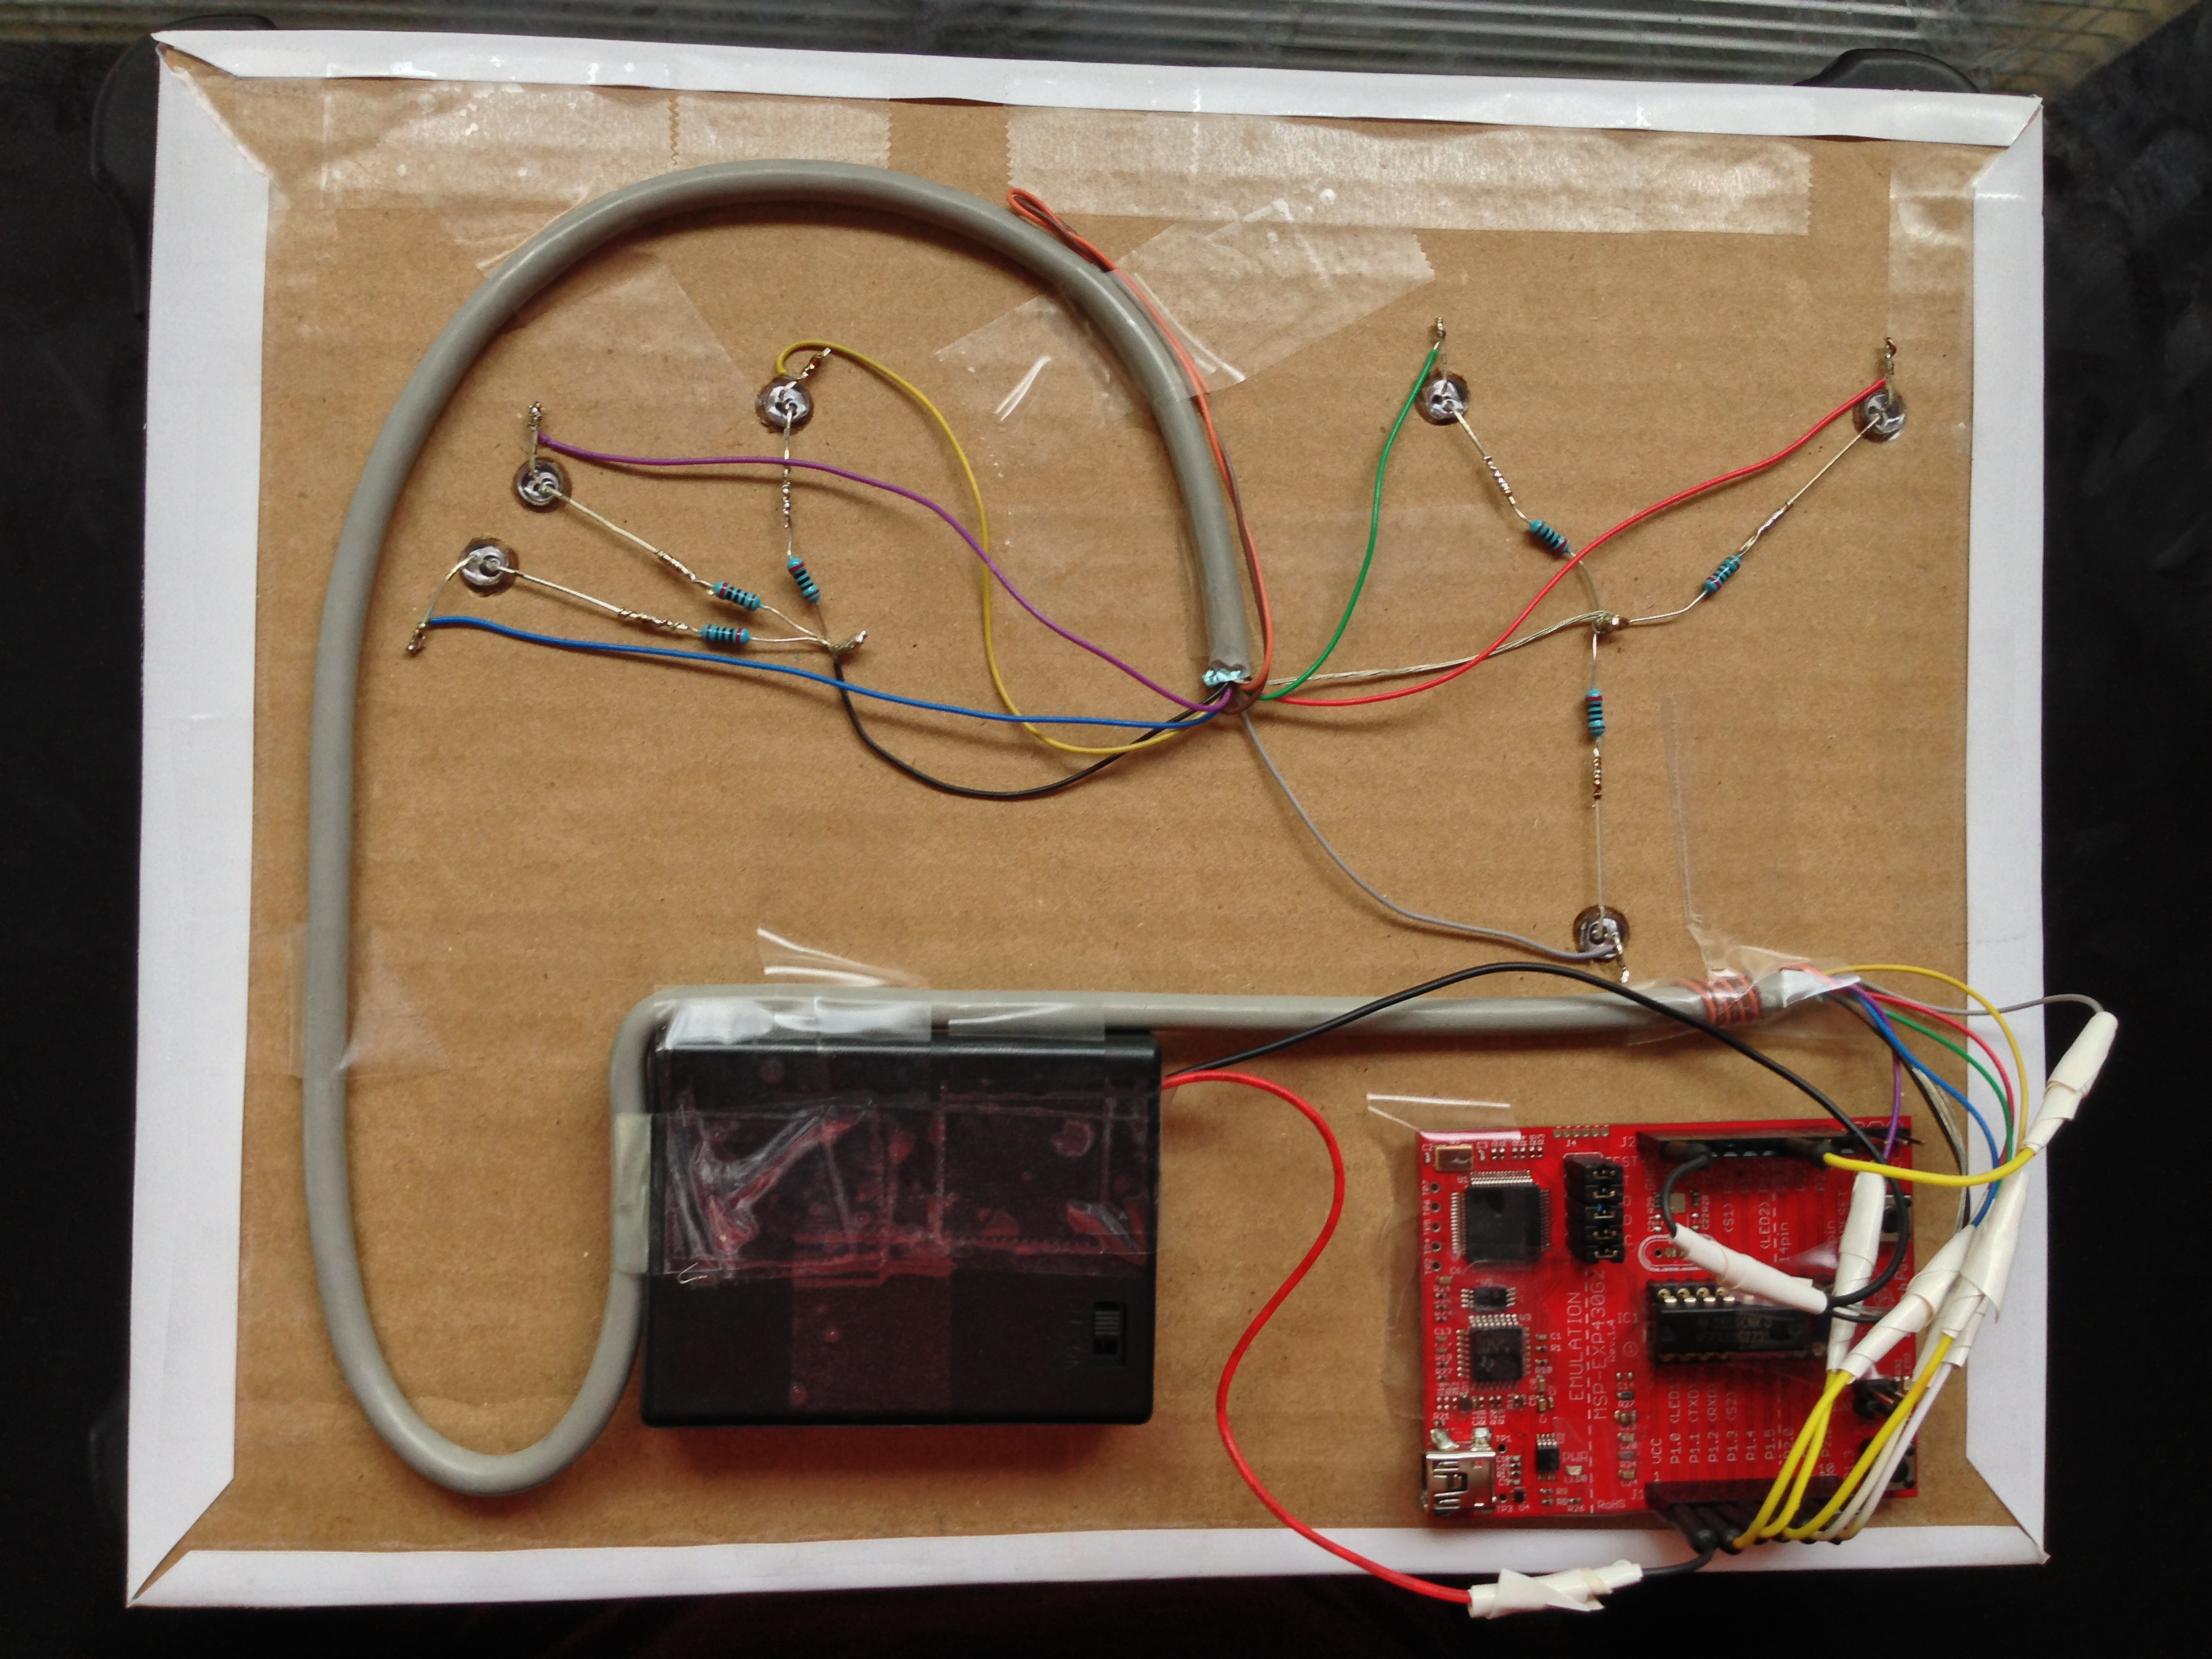
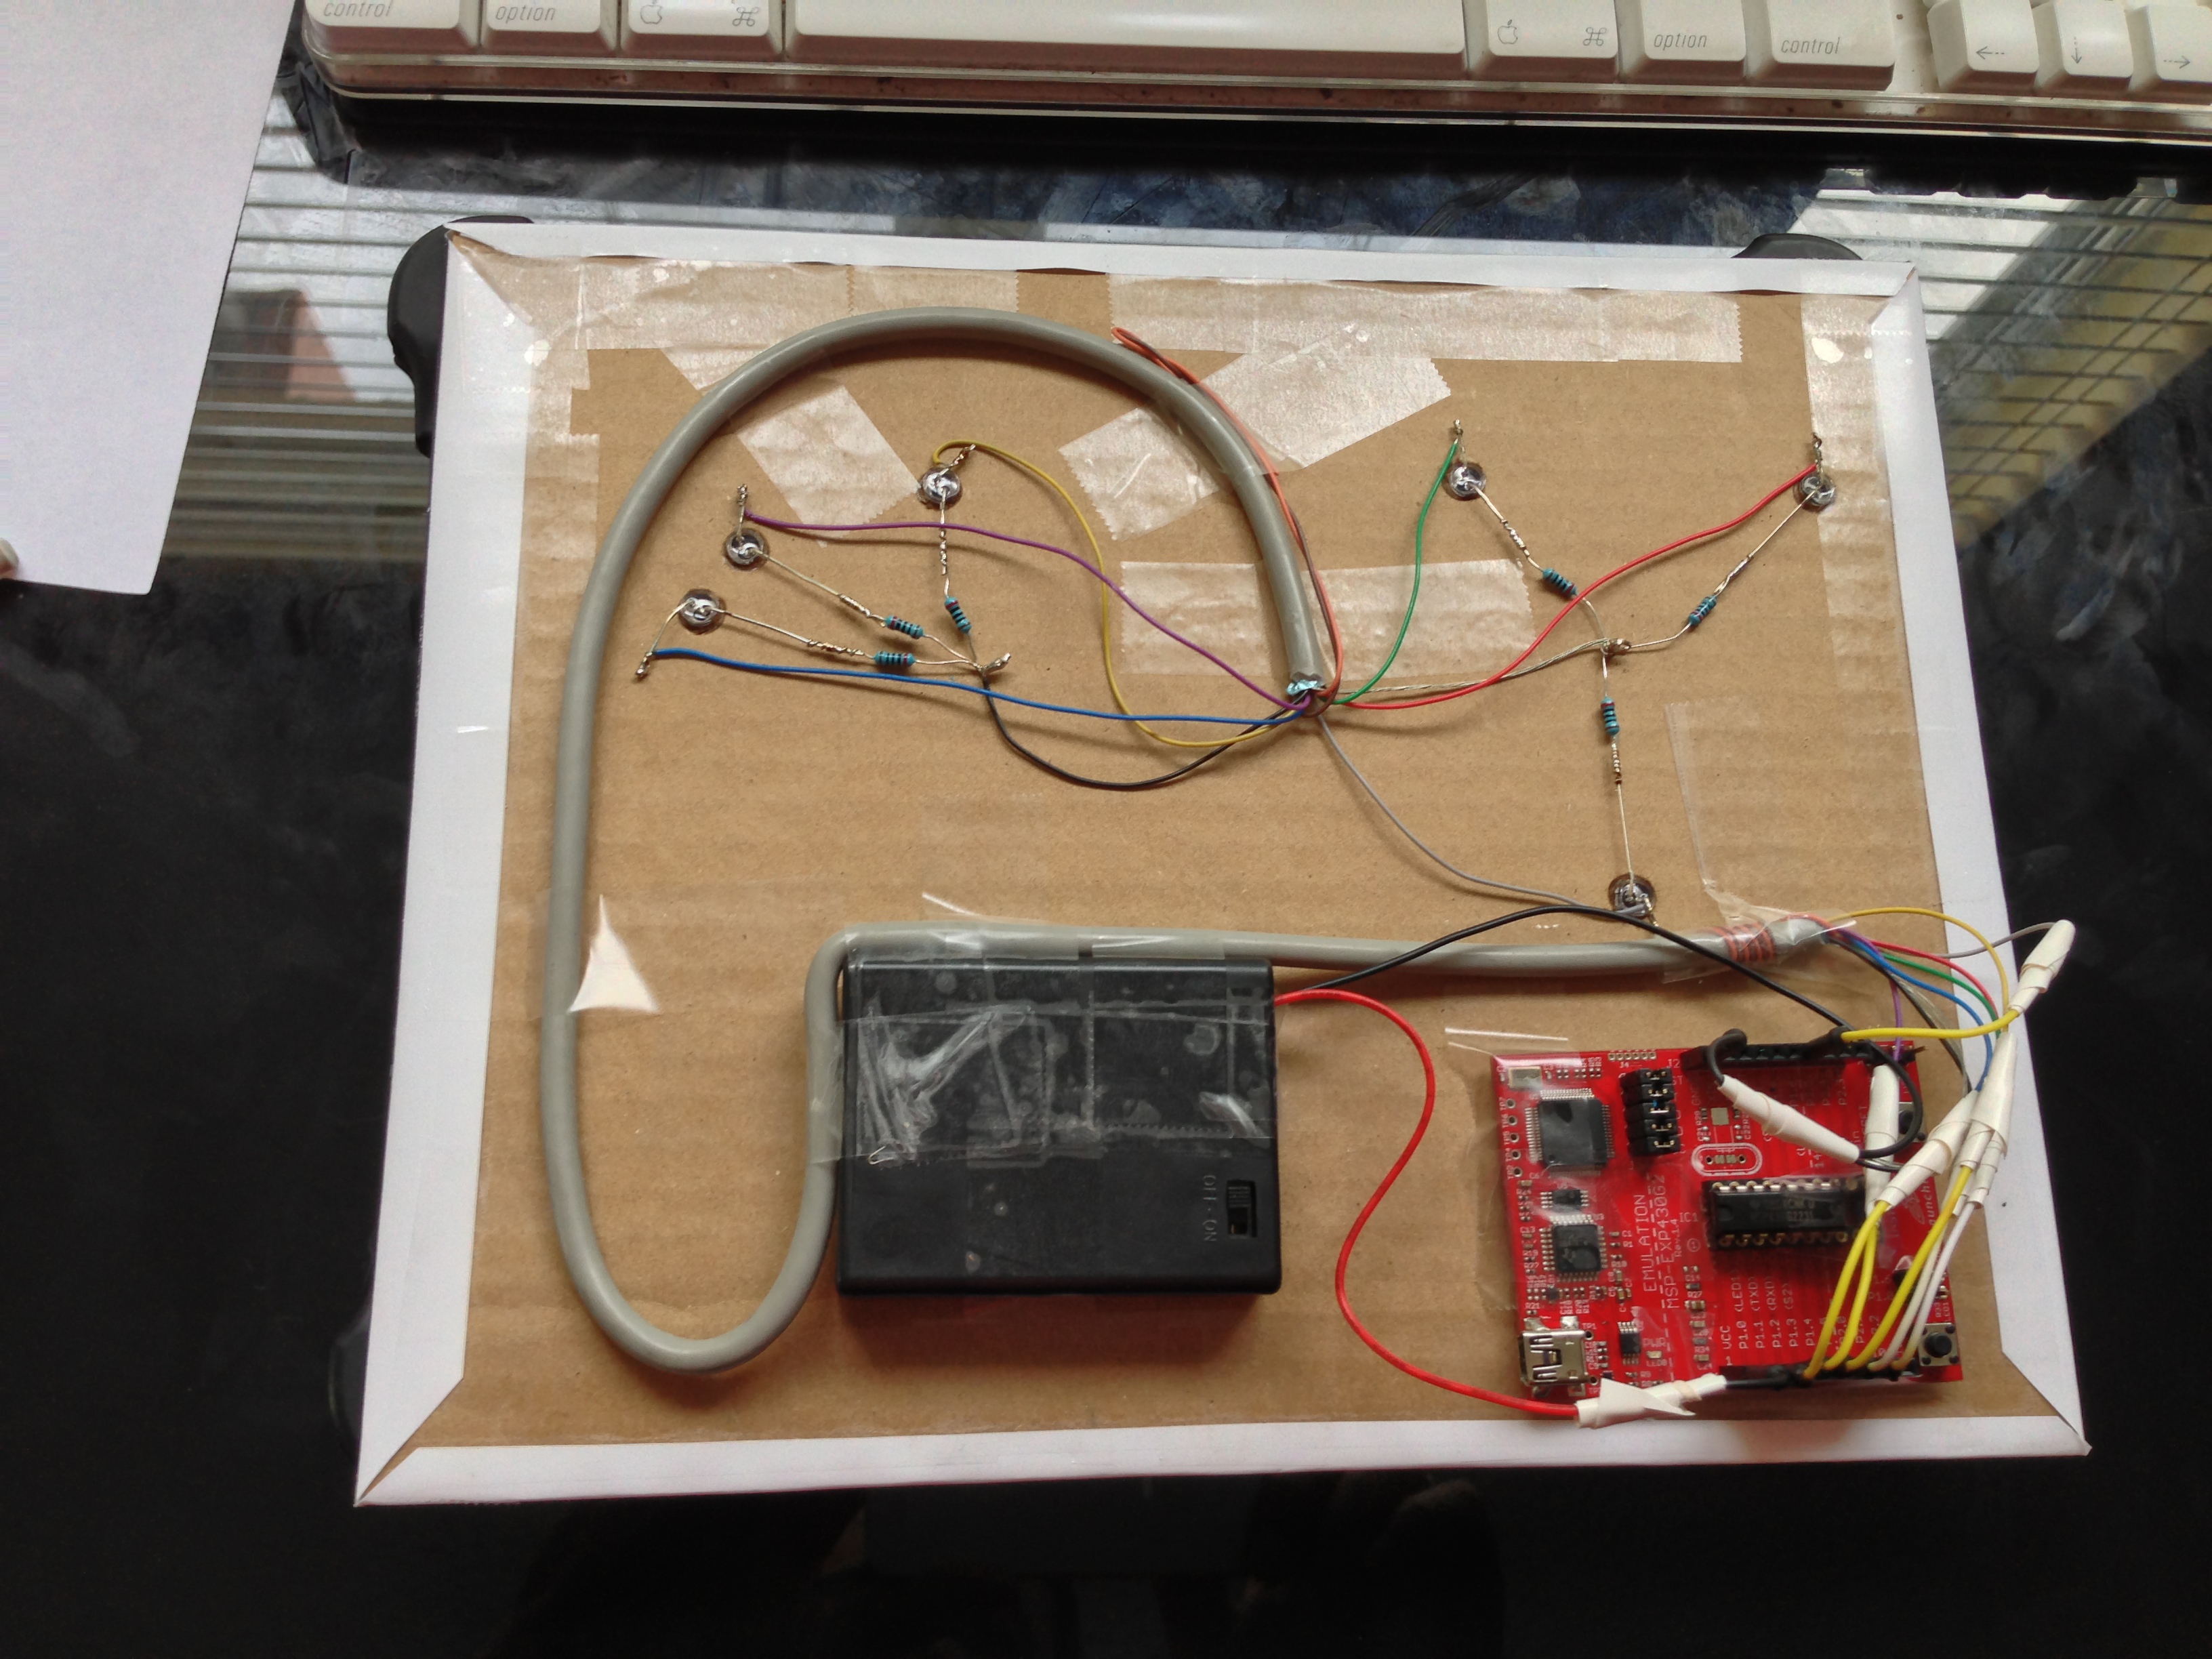
And was ready to go.

When you turn on-the battery pack, the program start blinking all the LEDs (to show that all are working), then you push the button once to turn them off, and afterward, just every time you push the button the corresponding star (following the paper presentation) start to blink.


And here’s the CODE:

//***************************************************************************************
// MSP430 Blink LED / Start Stop Blinking with Button Interrupt
//
// Description; We connected 6 outputs to the external LEDS
// don’t forget to remove the jumpers for the internal LEDs

//***************************************************************************************
#include <msp430g2231.h>
#define LED_0 BIT0
#define LED_1 BIT1
#define LED_2 BIT2
#define BUTTON BIT3
#define LED_4 BIT4
#define LED_5 BIT5
#define LED_6 BIT6
#define LED_OUT P1OUT
#define LED_DIR P1DIR

// Global Variables
unsigned int blink = 0;
unsigned int star = 0;
unsigned char leds = 0x0;

void main(void)
{
WDTCTL = WDTPW + WDTHOLD; // Stop watchdog timer
LED_DIR = 0x0;
LED_DIR |= (LED_0 + LED_1+ LED_2+ LED_4+ LED_5+ LED_6);
leds = 0x0;
// it boots with all leds blinking
leds = (LED_0 + LED_1+ LED_2+ LED_4+ LED_5+ LED_6);
LED_OUT = leds;
P1IE |= BUTTON;

__enable_interrupt();

for (;;)
{

LED_OUT ^= leds; // toggle leds
__delay_cycles(100000); // SW Delay of 10000 cycles at 1Mhz

}

}

// Port 1 interrupt service routine
#pragma vector=PORT1_VECTOR
__interrupt void Port_1(void)
{

P1IFG &= ~BUTTON; // P1.3 IFG cleared

switch (star)
{
case 1:
leds = LED_0;
star = 2;
LED_OUT = 0x0;
break;
case 2:
leds = LED_1;
star = 3;
LED_OUT = 0x0;
break;
case 3:
leds = LED_2;
star = 4;
LED_OUT = 0x0;
break;
case 4:
leds = LED_4;
star = 5;
LED_OUT = 0x0;
break;
case 5:
leds = LED_5;
star = 6;
LED_OUT = 0x0;
break;
case 6:
leds = LED_6;
star = 0;
LED_OUT = 0x0;
break;
default:
// first interrupt, turn off all leds
// getting ready to start
leds = 0x0;
// next time it gets interrupted is going to
// turn on the first led
star = 1;
// turn off all leds
LED_OUT = 0x0;
break;
}
}


Thank you Texas Instrument for a grate learning tool


Integrating a GeneXus (X) application with gxportal 4.5

First, you can download and import de following XPZ Data and Example. Which contains all the data views required to access the portal. (Make sure to have GeneXus X Update 3 or grater), in addition, and for now (hopefuly), you’ll have to add the additional DLL to the “bin” directory under ../web/bin, if you are developing for .NET

Importing Data Objects and Example


You have to set up the “GXportal” DataSource to access the database “gxportal” using the user “gxporta” (the default password is “gxportal” 🙂 )

DataSource to gxportal


Then, build it and execute.
Create Model


Menu Execution


On portal:

  1. Under “Configuration” Create a new Application
  2. Update the “Enviroments”, host where the application is located, port and the Virtual Directory is the “relative path” to the file (program) on the URL and filanlly the extension of the file
  3. Ad Activities (the actual program), under the Program Name just the actual name of the program ,without extension or path (we created on the step above under Environments)
  4. Under “Name” use the real name of the application, on the example is “TestWWEmployees” all together (same name as in Genexus)
  5. After that we’ll create 3 additional applications related to the main one, which reflect the status of the transaction, so later we can configure privileges, those are Delete, Display, Insert and Delete,  the “Name” we’ll use are going to be: TestTrnEmployee_DLT, TestTrnEmployee_DSP, TestTrnEmployee_INS and TestTrnEmployee_UDP all of them with NO Program Name (we’ll check the status on the actual Genexus Application)
  6. We create a “Menu” for the Application with one option that is going to be the Main Activity, in this case “TestWWEmployees”.
  7. Now let’s add the “Application” in to the portal, go to the page where you want to display the application, and add a GxPortlet of “Aplication Integration” and add “Application Activity”, now configure the Portlet where the “activity” points to our Main Activity (TestWWEmployees) and give it a “Dynamik hight” (make sure that the Hight of the portlet is NUL). At this point you’ll see the application running on the portal (although there is nothing to see because you don’t have the right privileges to see it right now 🙂 )
  8. Now, let’s create the Privileges to access the application, in order to do that, go to

Deploying GeneXus applications on CentOS with Ruby 1.9 and mysql (part 2)

If you haven’t’ read it, make sure to first, take a look at the part 1

What we’ll going to do today is actually create a GeneXus application with Ruby and mySql and deply (an run) it under CentOS platform

For this example we are going to install an run GeneXus “GoogleVisualization” Example.

You can download the KB from genexus open server.

First we recommend we run it under the Default Ruby web-brick (local) environment. This is your development environment.

And the have a Deployment environment, in my case I’ve named it “Ruby-Hosted”.

On this new environment you have to configure the following options:

Under DataStore, configure the credentials for your “production” mySQL database.

Under Generators, you have to change from “Webbrik HTTP server” to “Apache HTTP Server”.

On “Web Root”, the actual URL to the deployed website

and on “Site directory..” the full path of your application from “inside” the server.

Now you need to “Build All”.

Once it’s done, you simply copy the entire content of your “local deploy web directory” into your server deployed web directory, and run the application.

Now, you are “almost” ready, before you can RUN the program you have to run your “REORG” that on your first deployment is going to be the creation of the database.

In order to do that you need to “login” into your CentOS server through a TERMINAL, go to your deployment directory and run the reorg, like this:

$ cd /var/www/virtualhost/ruby.1oc.com/web

$ ruby reorganization.rb

DONE !

now point to your website and you see your Ruby application running

Deploying GeneXus applications on CentOS with Ruby 1.9 and mysql (part 1)

Firs of all you need a CentOS operating system with mysql, ruby 1.9 and passenger installed

If you don’t have this or you don’t know how to do it, just follow the simple instructions on these 2 posts:

Installing Ruby 1.9 on CentOS

Installing Phusion’s Passenger on CentOS (for Ruby 1.9)

Once you are done with this you are ready to move forward.

First you need to copy the following directories from your GeneXus installation to the CentOS server.

From under “gxruby” copy the “linux” and “generic” directory both under the same subdirectory.

In my case I’ve created a new directory on the server called “gxruby” (original 🙂 ), and put them there.

Now before you run the installation script, in order to work properly under CentOS you have to do the following:

  1. The installation script is based on Debian, so it expects to have certain libraries installed in places where CentOS doesn’t normally used them
    specially the “libmysqlclient”. On CentOS these library is called “libmysqlclient.so.15.0.0” and it’s under “/usr/lib/mysql/”, but in the installation
    script it should be under “/usr/local/lib/” so we’ll have to link it to the new location, we do this with the following command:
    $ ln -s /usr/lib/mysql/libmysqlclient.so.15.0.0 /usr/local/lib/libmysqlclient.so
  2. Under the subdirectory “gxruby/generic/gx_lucene” (this is where you copy from the GeneXus machine), you have to edit the script “build_make.sh”.
    In reality, because this file is corrupted on GeneXus Evo1 U3, it’s better if you delete it an create a new one with the same name with the following contente:

    #!/bin/sh
    tar -xzf clucene-core-0.9.21b.tar.gz
    cd clucene-core-0.9.21b
    sh autogen.sh
    sh configure
    make
    make install
    cd ..
    ruby extconf.rb –with-clucene-include=’clucene-core-0.9.21b/src’ –with-clucene-lib=’clucene-core-0.9.21b/src/.libs’ –with-ldflags=’-lclucene’
    make
    mkdir lib
    mv CLucene_gx.so lib
    gem build build_gem.rb
    gem install  CLucene_gx-0.1.1-x86-linux

NOTE:

In addition, if you are using a 64 bit platform replace the last line of the script for gem install  CLucene_gx-0.1.1-x86_64-linux

Now you are ready to run the installation script that will install all GeneXus gems on your system.

Go to “./gxruby/linux”, and run the “installgems.bash” script.

In order to do that just change the mode of the file to “executable” with $ chmod +x installgems.bash

and then runt $ ./installgems.bash

Now, you are ready to deploy your GeneXus Ruby applications.

If you don’t know how to do it, follow the next post where I’m going to walk you through the deployment process

😉

Installing Phusion’s Passenger on CentOS (for Ruby 1.9)

As a prerequisite you have to have installed Ruby 1.9.x on your CentOS system.

If you don’t know how to do it, follow the instructions on this post:

Installing Ruby 1.9 on CentOS

Once you are ready follow the next steps:

On a terminal type:

gem install passenger

$ passenger-install-apache2-module

This last command is going to walk you through the process of installation,

helping you install whatever is missing on your system and at the end giving the instructions

to “patch” your apache’s configurations file.

passenger-install-appache2-module

On my case, I had to install the following modules:

$ yum install httpd-devel

$ yum install apr-devel

$ yum install apr-util-devel

After installing them re-run the command again

$ passenger-install-apache2-module

And then edit the apache configuration

/etc/httpd/conf/httpd.conf

Ad the following lines to the file:

LoadModule passenger_module /usr/local/lib/ruby/gems/1.9.1/gems/passenger-3.0.2/ext/apache2/mod_passenger.so
PassengerRoot /usr/local/lib/ruby/gems/1.9.1/gems/passenger-3.0.2
PassengerRuby /usr/local/bin/ruby
And finally configure your VirtualDirectories (on the same file)
<VirtualHost *:80>
ServerName ruby.1oc.com
DocumentRoot “/var/www/virtualhost/ruby.1oc.com/web/public”
<Directory “/var/www/virtualhost/ruby.1oc.com/web/public”>
AllowOverride all
Options -MultiViews
</Directory>
</VirtualHost>
Now reboot the apache server
$ /etc/init.d/httpd restart
Stopping httpd:                                            [  OK  ]
Starting httpd:                                            [  OK  ]
Now you are ready to go.
Test the site http://ruby.1oc.com/
ruby.1oc.com