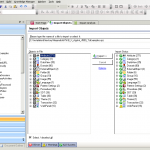
First, you can download and import de following XPZ Data and Example. Which contains all the data views required to access the portal. (Make sure to have GeneXus X Update 3 or grater), in addition, and for now (hopefuly), you’ll have to add the additional DLL to the “bin” directory under ../web/bin, if you are developing for .NET

You have to set up the “GXportal” DataSource to access the database “gxportal” using the user “gxporta” (the default password is “gxportal” 🙂 )

Then, build it and execute.

On portal:
- Under “Configuration” Create a new Application
- Update the “Enviroments”, host where the application is located, port and the Virtual Directory is the “relative path” to the file (program) on the URL and filanlly the extension of the file
- Ad Activities (the actual program), under the Program Name just the actual name of the program ,without extension or path (we created on the step above under Environments)
- Under “Name” use the real name of the application, on the example is “TestWWEmployees” all together (same name as in Genexus)
- After that we’ll create 3 additional applications related to the main one, which reflect the status of the transaction, so later we can configure privileges, those are Delete, Display, Insert and Delete, the “Name” we’ll use are going to be: TestTrnEmployee_DLT, TestTrnEmployee_DSP, TestTrnEmployee_INS and TestTrnEmployee_UDP all of them with NO Program Name (we’ll check the status on the actual Genexus Application)
- We create a “Menu” for the Application with one option that is going to be the Main Activity, in this case “TestWWEmployees”.
- Now let’s add the “Application” in to the portal, go to the page where you want to display the application, and add a GxPortlet of “Aplication Integration” and add “Application Activity”, now configure the Portlet where the “activity” points to our Main Activity (TestWWEmployees) and give it a “Dynamik hight” (make sure that the Hight of the portlet is NUL). At this point you’ll see the application running on the portal (although there is nothing to see because you don’t have the right privileges to see it right now 🙂 )
- Now, let’s create the Privileges to access the application, in order to do that, go to

