Whit this example we’ll show how to create ANY groups under gxPortal, and apply certain privileges, or GRANT privileges to those groups, to perform the basic MODES under Genexus.
That is:
DSP – Display
DLT – Delete
UPD – Update
INS – Insert (Create)
EXP – Export
So, when you “put” a Work With Pattern under the portal, all those Privileges are Guarantee to work automatically.
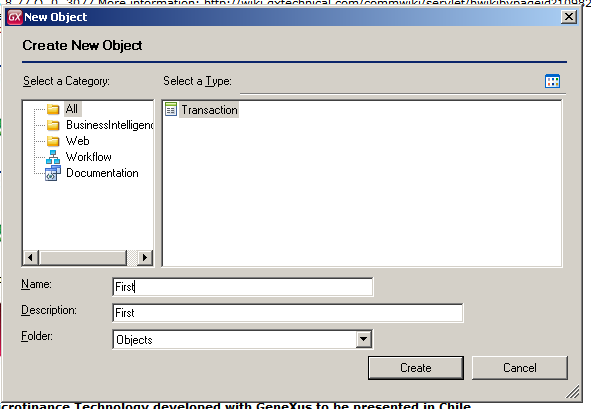
First Step.
On the Application we are working under the portal, let’s create the following 5 Activities:


As you can see on the pictures bellow there is a special Activity, that we call WWUsers_ALL which in terms, includes ALL the rest, what this means, is that the “group” that is assigned this Applications has “Admin” privileges, ALL the privileges


Second Step
There is a Procedure that is called by the WW every time they are executed, and its “isAuthorized”
Here’s where we’re going to put some code:
&Authorized = True
LoadContext.Call(&Context)
&Context.Porta_access_DLT = false
&Context.Portal_access_DSP = false
&Context.Portal_access_EXP = false
&Context.Portal_access_INS = false
&Context.Portal_access_UPD = false
//////////////////////// Check GXportal Security /////////////////////////
&GXPConnInf.DBConnection.Type = GXPDBConnectionType.LAN
&GXPActivity = New GXPActivitySDT()
&GXPActivity.Name = lower(&GxObject)
&GXPChkSec.Activities.Add(&GXPActivity)
&GXPActivity = New GXPActivitySDT()
&GXPActivity.Name = !”WWUsers_” + GAMMode.INS
&GXPChkSec.Activities.Add(&GXPActivity)
&GXPActivity = New GXPActivitySDT()
&GXPActivity.Name = !”WWUsers_” + GAMMode.DSP
&GXPChkSec.Activities.Add(&GXPActivity)
&GXPActivity = New GXPActivitySDT()
&GXPActivity.Name = !”WWUsers_” + GAMMode.UPD
&GXPChkSec.Activities.Add(&GXPActivity)
&GXPActivity = New GXPActivitySDT()
&GXPActivity.Name = !”WWUsers_” + GAMMode.DLT
&GXPChkSec.Activities.Add(&GXPActivity)
&GXPActivity = New GXPActivitySDT()
&GXPActivity.Name = !”WWUsers_EXP” // export Data
&GXPChkSec.Activities.Add(&GXPActivity)
Call(PGXPCheckSecurity , &GXPChkSec, &GXPConnInf, &GXPStatus )
//////////////////////////////////////////////////////////////////////////
If not Null(&GXPStatus.Id)
&Authorized = False
endif
// Valid Access /////////////////////////////////////////////////////////
For &GXPActivity In &GXPChkSec.Activities
//msg(‘Name: ‘ + &GXPActivity.Name + ‘ – ProgramName :’ + &GXPActivity.ProgramName + ‘ – Status :’ + &GXPActivity.Status + ‘ – Access :’ +&GXPActivity.Access)
Do Case
Case &GXPActivity.Name = &GxObject
if &GXPActivity.Access = GAMBoolean.False
&Authorized = False
endif
Case &GXPActivity.Name = !”WWUsers_” + GAMMode.INS
&Context.Portal_access_INS = &GXPActivity.Access
Case &GXPActivity.Name = !”WWUsers_” + GAMMode.DSP
&Context.Portal_access_DSP = &GXPActivity.Access
Case &GXPActivity.Name = !”WWUsers_” + GAMMode.UPD
&Context.Portal_access_UPD = &GXPActivity.Access
Case &GXPActivity.Name = !”WWUsers_” + GAMMode.DLT
&Context.Porta_access_DLT = &GXPActivity.Access
Case &GXPActivity.Name = !”WWUsers_EXP”
&Context.Portal_access_EXP = &GXPActivity.Access
//ExportExcel.Visible = &GXPActivity.Access
//TImportExcel.Visible = &GXPActivity.Access
EndCase
EndFor
//////////////////////////////////////////////////////////////////////////
SetContext.Call(&Context)
After that we are ready to call the WWs from inside the portal
Let’s just analyze it a little bit:
First we reset the “Modes” we’ll be load in the Context later
&Authorized = True LoadContext.Call(&Context) &Context.Porta_access_DLT = false &Context.Portal_access_DSP = false &Context.Portal_access_EXP = false &Context.Portal_access_INS = false &Context.Portal_access_UPD = falseThen we prepare the “Actions” to be checked on the gxPortal
//////////////////////// Check GXportal Security ///////////////////////// &GXPConnInf.DBConnection.Type = GXPDBConnectionType.LAN &GXPActivity = New GXPActivitySDT() &GXPActivity.Name = lower(&GxObject) &GXPChkSec.Activities.Add(&GXPActivity) &GXPActivity = New GXPActivitySDT() &GXPActivity.Name = !”WWUsers_” + GAMMode.INS &GXPChkSec.Activities.Add(&GXPActivity) &GXPActivity = New GXPActivitySDT() &GXPActivity.Name = !”WWUsers_” + GAMMode.DSP &GXPChkSec.Activities.Add(&GXPActivity) &GXPActivity = New GXPActivitySDT() &GXPActivity.Name = !”WWUsers_” + GAMMode.UPD &GXPChkSec.Activities.Add(&GXPActivity) &GXPActivity = New GXPActivitySDT() &GXPActivity.Name = !”WWUsers_” + GAMMode.DLT &GXPChkSec.Activities.Add(&GXPActivity) &GXPActivity = New GXPActivitySDT() &GXPActivity.Name = !”WWUsers_EXP” // export Data &GXPChkSec.Activities.Add(&GXPActivity) Call(PGXPCheckSecurity , &GXPChkSec, &GXPConnInf, &GXPStatus ) //////////////////////////////////////////////////////////////////////////and here we check that the actual “program” (work with) it’s authorized to be access under the “current user”, the user who is logged in the gxPortal
Case &GXPActivity.Name = &GxObject if &GXPActivity.Access = GAMBoolean.False &Authorized = False endifAnd on the rest of the “case” we assigned the MODE to the “Context” to be used latter.
At this point pretty much ends up the “automatic” user control of privileges, now we need to proceed to write / apply the rules based on the “Modes”
Third Step
Now we work on the Transaction’s Work With Pattern
Once we’ve applied the Work With Patter, we select the “Modes” on the Main Selection Level of the Pattern.

And now we defined the “Condition” we want to apply for each MODE, for example, for INSERT we want “&Context.Portal_access_INS” to be “TRUE”, so we defined it as shown on the next pictures:


Here you can see an example of how it works with a user logged in with “DSP” privileges

And here with “UPD” privileges, notice the differences, in the previous one all the options were grayed out, on this one the “Edit” it is NOT, so he/she can edit the record

So far everything it’s working fine, but here is where it gets a little bit tricky, take a look at the next images showing the “TABs” on the Work With:


As you can see on the pictures above NONE of the privileges have been applied (by default) on the tabs, in order to correct that, we have to repeat the same procedure for the MODES on each “TAB” of the work with.
NOTE:
There should be a way to apply the same concepts to the “TRANSACTIONS” inside the gxPortal, but I haven’t try anything yet. Please, let me know if you can figure it out an easy way to apply the privileges through the WW inside the Transactions.
Thanks.