Parts I used on this project:
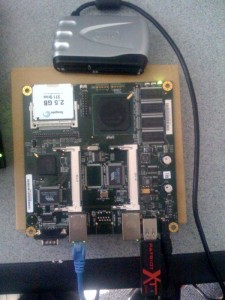
- Alix 2c2 for PC Engines ( http://www.pcengines.ch/alix2c2.htm )Here’s the board specifications alix2c.pdf
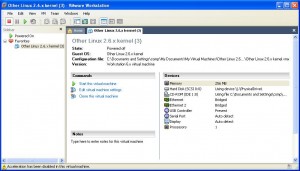
- PC running Windows with Vmware (in my case, I used the workstation edition, but probably the free-server edition could be used)
- Seagate Micro-drive 2.5G (bigger sizes work as well)
- USB-CF interface
- 2G thumb-drive
– 256 Mb of memory
– 2 bridge networks
– 1 usb
– 1 serial
– for the CD use the image of the pbx you want to instal.
– as a Hard-drive use the 2.5G Micro-drive PhisycalDrive
It’s important that you use the PhisycalDrive option of the vmware instead of the default one (create a file), so the Micro-drive is going to be he disk of our PBX.
If you use a different alix board, just make suer to include the configuration that best matches your board, for example, if you have an alix with ONE ethernet card, just use ONE
You also have to match the type of kernel you are using, in our project, we use 2 different pbx, Trixbox, and Elastix, both are based on 2.6.x linux kernel.
To learn more about Trixbox, go to their website at Trixbox.org, you also can download there the latest ISO image. For consitancy purposes we include here the image we use for this project so you can replicat it exactlly.
Click here to download the 2.6.1 ISO image.
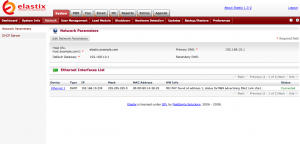
To learn more about Elastix, go to their website Elastix.org. And here’s the ISO image as well.
After mounting the ISO image on the CD/DVD of the virtual machine, just boot and install it.
Once your are done, we’ll need to change some boot parameters that are more appropriate for an embedded solution:
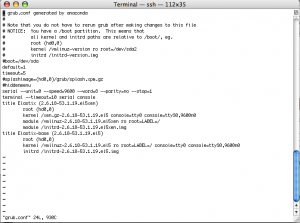
edit /etc/grub.conf
Comment out these 2 lines by putting a # at the beginning of the line:
#splashimage=(hd0,0)/grub/splash.xpm.gz
#hiddenmenu
Add these 2 lines:
serial –unit=0 –speed=9600 –word=8 –parity=no –stop=1
terminal –timeout=10 serial console
And add this to the end of each line that begins with “kernel”:
console=tty0 console=ttyS0,9600n8
(This tells Grub to direct console output to both the standard ttys (the ones you get with a keyboard and monitor) as well as the serial port (ttySx).)
Add this to the bottom of /etc/inittab:
S0:12345:respawn:/sbin/agetty ttyS0 9600 linux
(the “S0? is just a unique identifier; no two entries in inittab can start with the same thing. 12345 means all run levels (they correspond to /etc/rc2.d, rc3.d, etc) and respawn will ensure that it will accept another login after you log out.)
If you want to allow root to login over the console (versus logging in as a normal user and su-ing), add “ttyS0? to the bottom of /etc/securetty:
echo ttyS0 >> /etc/securetty
edit /etc/sysconfig/init and change
BOOTUP=color
to
BOOTUP=serial
to prevent the graphical startup from blowing up your terminal.
If you have kudzu running (use chkconfig or look in /etc/rc3.d to see if it runs during boot):
edit /etc/sysconfig/kudzu
set SAFE=yes
(Do only ’safe’ probes that won’t disturb hardware. Currently, this disables the serial probe, the DDC monitor probe, and the PS/2 probe.) This prevents kudzu from hiccuping the serial port while you’re connected to it during boot.
Shut down the virtual machine and remove the CF card. Plug the CF card into the Alix and boot. You can use a serial cable to watch it boot, or wait about 2.5 minutes, and it will be ready to use.
And here you have it, 2 different VoIP pbx running on your embedded platform
Now, let’s backup the images:
Mount to the ALIX a thumb-drive big enough to hold the CF disk, in our case 2G is enough.
mount /dev/sda1 /mnt/usb
dd if=/dev/hda bs=1k conv=noerror,sync | gzip -c > /mnt/usb/trixbox-backup.img
umount /mnt/usb
Now you have the backups.
For your convenience and if you want to skip the project and jump to the results, I’m including here the 2 backup images of this 2 pbx
Download here the Trixbox backup image and here the Elastix one.
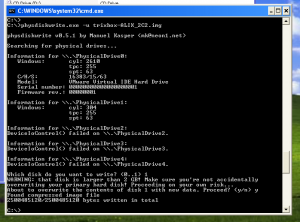
You can use physdiskwrite on windows to dump the backup image to the Micro-drive.
You can download physdiskwrite from their official website ( http://m0n0.ch/wall/physdiskwrite.php ) or from here, this is the version I sued for the project.
Regards.

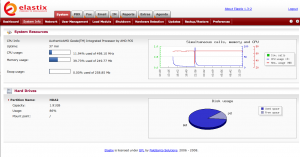
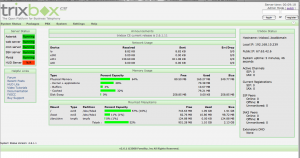
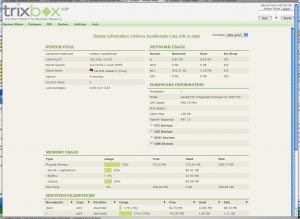
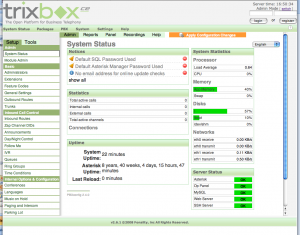
Thanks for posting the Trixbox Alix image. I’ve downloaded it and run it on a ALix box.
Pls let me know what the root password is to login at the console.
Thanks
Gallus
I left the root password for both images as “admin”.
Hi, I just download the image for trixbox, copy it to CF with physdiskwrite, boot the Alix 2c2 and get the following:
PC Engines ALIX.2 v0.99
640 KB Base Memory
261120 KB Extended Memory
01F0 Master 848A SanDisk SDCFH2-002G
Phys C/H/S 3970/16/63 Log C/H/S 992/64/63
GRUB Loading stage2…….
xψxψψxψxψxxψxψxψxxψxψxψxxxψxxψxψxψxxxψxxxxxψxψxψxψxxxψxψxψxψxxxxxψxψxψψxψxxxψxψxψxψxxψψxψxxψxxxxψxψxxψxψxψψxψxxxψxψxψxψxxψψxψxxψxxxψxxψxxψxψxψψxψxxxψxψxψxψxxψψxψxxψxψxxxψxxxψxψxxxψψxxψxψxψxxxxxxxxxxxxxψxψxxxxψx
…and nothing else
Is the image corrupted?
I will test the elastic image and i return back with the results.
Please advice
thanks
petros
Hi again,
Also with Elastix image the results are the same…..
Thnks
Petros
Are you using a Hard Drive CF? It does NOT work with a regular CF memory. It has to be a Micro-drive
Hi, thanks for your reply.
I used a SanDisk ultra II 2 Gb
Thnks
Petros
Installed today Elastix 1.3 on a CF Sandisk
4 GB
All OK great job ADMIN !!
the Alix is a 6B2
Will these images work on alix boards with 3 ethenet ports ?
I haven’t test it, you might have problems with the number of Ethernet ports setup on the image (2)
Why don’t you try it from scratch?
Let me know.
Pingback: Hosted “ Pbx in a Flash” Server in the Uk
I really very liked this post. Can I copy it to my blog? Thank you in advance. Sincerely
Sure. 🙂
Hi.will u be able to upload an image for a normal CF and not a microdrive?please
Does NOT work on a CF drive, it has to be a Micro Drive, is because of the drivers.
hi. i tried to follow the above mentioned guide but when it starts i am getting a grub error 17.
any ideas on how to deal with the installation to a CF. is there a way to have an image of elastix or trixbox ready to be copied to a cf?
Does NOT work on a CF drive, it has to be a Micro Drive, is because of the drivers.
You can use the images I’ve provided on the blog, they worked fine, but ONLY on a Micro Drive
hi. thanks for the great tutorial. i would just like to know can elastix be updated automatically from the web interface. because having to do this procedure everytime a new release is available can be long.
one more question what is the ram load on alix on eslastix. with email,im,pbx
thanks
right, yesterday i bought a microdrive and i have tried to boot the system but it hangs the boot. have in mind that i used alix 3d3. it hangs both trix and alix. any ideas?
Yes, it think is not booting because the hardware configuration is different.
Why don’t you try it from scratch, following the instructions from the beginning?
Regards
hi. thanks for your reply.
i am trying to do it from scratch but at the boot (before installation) i am getting an error (grub error 17)
Hi Many thanks for the great tutorial,
how can i avoid read write cycle of CF card?
or has anyone tested those 2 images with harddisk driver and Alix board?
regards
nedi
All the testing we’ve done and the step-by-step tutorial are done on a CF Hard drive, NOT a real CF for 2 reasons, the main one is as you mentioned the read/write cycles, the second one is the drivers to mount/boot the CF.
Regards
A great article for creating a full blown IP-PBX on a small lightweight platform. Makes it ideal for use as an appliance.
All you need now is a good voip provider for calls and you have a office phone system solution.
Thank you for this interesting tutorial.
I am wondering if it is possible to have usb gsm voice modem (these are sold from mobile operators to be used as mobile internet connection for laptops and looks like usb flash) connected to alix board, and using it as a gsm gateway as well. I am concerning about drivers of the usb device.